Blog

Home Maintenance

Did You Know? Granite Edition


There’s no doubt that granite is one of the most popular countertop choices on the market today, but how much do you really know about this popular stone? We have compiled a short list of facts about the granite that we offer here at Ball Homes.
  • Ball Homes currently offers nine different granite selections.  One of the wonderful features about this popular stone is that no two pieces are alike.  As they carve the stone from the mountains, the colors, veining patterns and movement will change.  The samples in the design studio do not begin to show the color, movement, and variation that they will have in a large slab, so there is always the possibility that the actual color of the stone will vary up to a full shade from what is in our Design Studio.  That is part of the innate beauty of the product and what enables our buyers to further personalize the look of their new home.
  • Granite is an incredibly strong and durable option for kitchen countertops, but it is also a porous surface, which means that spills and stains can seep into the stone and discolor it if not treated properly. Be diligent of splashes and spills to avoid deep stains. Avoid letting citrus or alcohol products sit on the granite surface as it can etch and dull it.  Granite surfaces are heat resistant and scratch resistant, but not heat proof or scratch proof. Make sure you use caution when it comes to placing hot items directly on your countertop. For tips on how to clean and maintain your granite surfaces, read our previous blog post here.
  • As added value for our homeowners, Ball Homes will install your granite countertops with a protective sealer already on it. There is no initial maintenance on the countertops in your home, but like any home, there will be upkeep down the road. Homeowners will need to reseal their granite countertops about once a year—an easy project almost anyone can do.  Click here for a tutorial video on how to properly seal your granite countertops.
What do you think about granite countertops? Do you have them in your home? Let us know on our Facebook page!

Protect Your Furniture in your New Ball Home

Moving into a new Ball home may also mean getting new furniture. Having new furniture can be really exciting, that is until you spot the first stain or chip and realize that your furniture is no longer brand new. However, if you take care to clean your furniture carefully and regularly, you will find that it stays looking newer for longer. Use these tips to care for your furniture and it will last for years to come.
Leather Furniture
Each item of leather furniture that you buy should come with instructions from the manufacturer on how you should care for the item. However, in general most leather items can be cleaned with the commercial leather cleaning solutions that you can find in your local supermarket. For the occasional sticky finger residue or food spills, a swipe with a slightly damp cloth will do the trick. Just make sure you wipe up any excess liquid to keep the leather from staining or drying out. Leather furniture is also very sensitive to heat and light, so make sure you keep it away from windows, fireplaces, and central heating vents.
Wood Furniture
The most important thing to remember about wood furniture is that it needs to be dusted...quite a lot. This can be annoying but if you get into a regular cycle, then you’ll find it just becomes natural for you to wipe and polish the wooden surfaces a few times a week. Like leather, wood is very sensitive to heat and light, so position your furniture away from heating vents, fireplaces or radiators. Don't store it in attics or garages, where temperature and humidity levels vary widely from summer to winter, day and night. Avoid placing furniture in areas where it will sit in direct sunlight, which can fade or discolor it; use drapes, sheers or protective window films to guard against the sun's rays. Use placemats, tablecloths, or coasters to protect your furniture from the heat and cold of dinner plates and glasses.
Upholstered Furniture
Dust and dirt can cling to upholstered furniture much more easily than wood and leather. Make sure you vacuum on a weekly basis. Lift up couch cushions and pillows and clean the crevices underneath where crumbs love to hide. Flip and rotate loose cushions regularly to distribute wear more evenly. Switch the position of a love seat and a sofa, or swap the positions of a set of chairs as the seasons change. Consider using a spray-on fabric protector as another layer of protection from spills and smudges. You can have your furniture retailer apply a layer of protector, or you can purchase your own commercial product. If you choose to do it at home, make sure you read the instructions thoroughly and carefully.


Making a Basic Tool Kit

There is no doubt that, at some point, you will need to use a tool kit when you move into your new Ball home. From hanging pictures on the wall, to installing new curtain rods, make sure you’re prepared for anything life (and possibly your decorating style) throws at you by assembling a basic tool kit for your home.
There are a couple of different ways you can go about assembling a tool kit. Many stores offer a complete set of tools in an already assembled kit, or you can purchase individual tools as you need them. Depending on your budget at the time, one option might be easier than the other. The most basic tools will often get the most wear and tear, so make sure you buy tools that are of good quality.
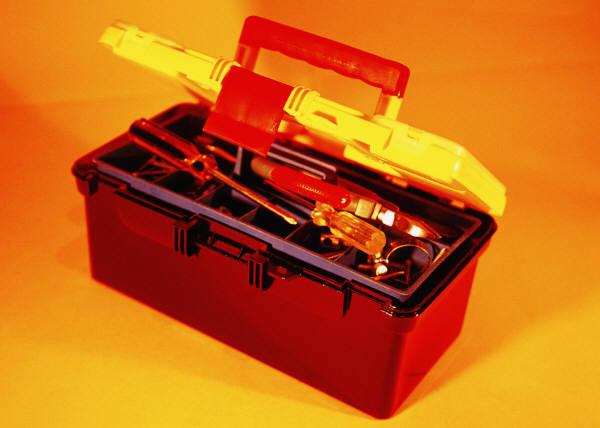
·         A tool box, bag, or bucket to put everything in
There’s nothing worse than not being able to find the tool you want when you need it because everything is scattered all over the place. Make sure you have a large box or bag to put all your tools in at the end of the day. Don’t worry about buying a container that is too big--you’ll fill it up eventually.
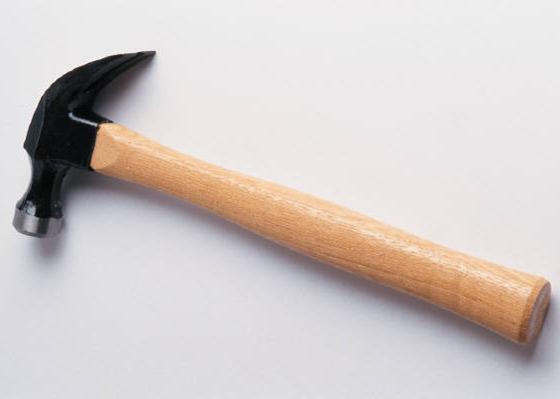
·         A claw hammer
A claw-style hammer is used to drive and pull nails. This style of hammer will more than likely accomplish any job you need around the house. The more you use one, the more you’ll appreciate a cushioned grip.

·         Screwdrivers
There are many types of screwdrivers out there. The most common ones you will need are varying sizes of a flathead screwdriver (the one with a straight edge) and a Philips head screwdriver (the one with a + at the end). If storage is tight, buy a screwdriver with interchangeable tips.
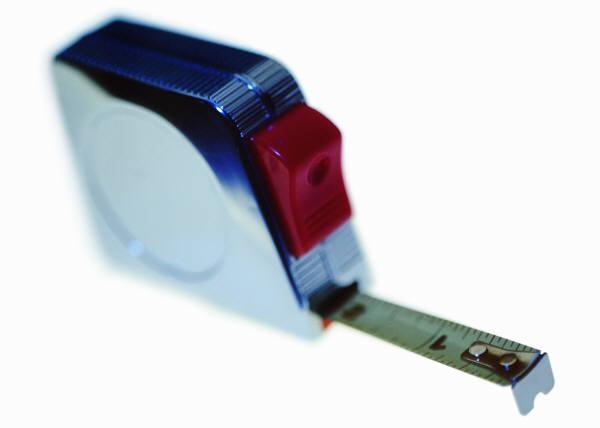
·         Measuring Tape
Purchase a model that has a blade lock on it, so you can measure what you need without it snapping back on you. The blade should be at least 3/4” thick to keep the tape from buckling when you’re measuring longer lengths. 

·         Flashlight
A flashlight is vital if the power goes out or you are working in a tight area. For starters, any sturdy flashlight will do for your collection, but eventually, you can include other lights of various sizes or ones that can bend or tilt.
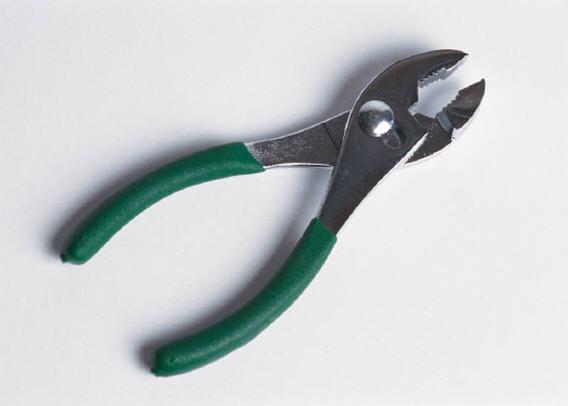
·         Pliers
Standard pliers and needle nose pliers do different types of the same job. Needle nosed pliers are handy when you are working with something small and need to grip or bend wires.Heavy grooved pliers are better for removing nails or large staples. Your hands will thank you for getting pliers with padded grips.

·         Utility Knife
It is important to have a sharp, sturdy utility knife. These knives work well for trimming or slicing and the blade can be used to open many types of products. A better option would be to get a knife with a retractable blade, for safety and storage convenience.
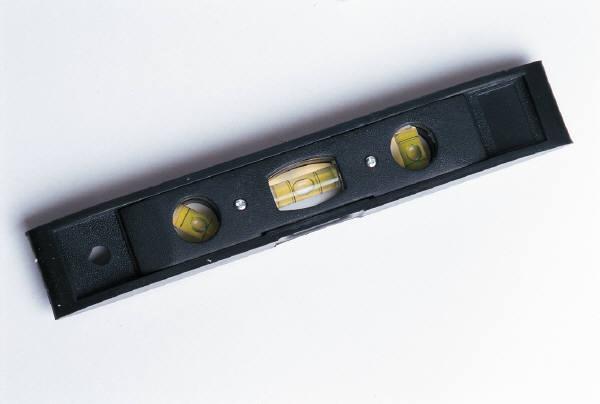
·         Level
A level is a must for straightening up pictures, drilling holes in a level line, checking tabletop alignment, or mounting towel bars perfectly. It's important to get an accurate level for accurate positioning. A good sturdy level will last a lifetime, so make sure you go with a quality brand.
 
·         A variety of hardware
Finding the right size screw, nut, or bolt can be intimidating. Luckily, most hardware stores sell handy kits full of the most common sizes. Alternatively, get a few screws, bolts, and nails in small, medium, and large sizes to keep on hand. Having some in silver tones and some in gold tones is a good idea, too. In all events, hardware stores are usually staffed with friendly experts who can answer your questions and point you in the right direction.
·         Power drill
As the unquestioned king of the power tools, a power drill will save you lots of time and offers versatility. You can use a cordless drill for light home maintenance and repair jobs.
Besides drilling holes in a variety of materials, it can be used for grinding, sanding, polishing, and mixing paint. If possible, buy a variable speed drill. You'll find this particularly useful for driving screws, and if the drill also has a reverse switch, you can remove screws as well.
This list is, by no means, all-inclusive. As your life changes, you may find that your tool needs change as well.

Organizing Tips for Your Laundry Room


Laundry rooms seem to be a catch-all for many homes. Your living room, kitchen, bathrooms, and bedrooms normally get a deep clean every now and then, but the laundry room seems to get overlooked. While you wait for your dream to come true that the laundry fairy would come for a visit at your house, make sure you’re getting the most out of your laundry area by making sure it’s clean and organized.
Hampers:
Make sure everyone in the family puts their laundry in the dirty clothes hamper. It will save time by not having to pick up clothes off the floor and sort them. If you have enough space where you store your hamper, get a basket with multiple sections, like this one from Target, so that your family can separate their clothes as they drop them in the bin.
Cleaning Supplies:
Cleaning supplies don’t really work unless you can find them when you need them. Store your bottles and containers together in a plastic caddy and stick it on an easy-to-reach shelf. If you have wire shelving, the caddy will help keep bottles from spilling. If you make your own cleaning supplies, make sure each bottle is clearly labeled.
Stain Chart:
Spill wine on your favorite sweater? White t-shirts not so white anymore? Keep all your stain removal tips in one place, so you won’t have to go searching for the ingredients to rid your favorite pair of pants of that unwanted blemish. We really like this printable stain chart from Martha Stewart. Laminate it and tack it up on the wall or a cabinet where it will be easily seen.
Lost and Found:
Who hasn’t lost a sock to the dryer every now and then? Use clothes pins to tack the remaining mate to the outside of your laundry basket until the other one has been found. Keep a small basket on top of the washer to hold change and other miscellaneous items you find in pockets. Consider keeping a small trashcan next to your dryer to throw your used dryer sheets or the contents of the lint trap.
How do you keep the laundry area clean and organized at your house? Let us know on our Facebook page!

Cleaning the Kitchen Sink


You use the kitchen sink to clean the dishes, but what do you use to clean the sink? You would think that it would be one of the cleanest areas of the kitchen, but grime and bacteria love to lurk in damp areas, and the kitchen sink is prime real estate. Follow these few quick cleaning tips to keep your sink grime-free.
Try to avoid using harsh chemical cleaners when cleaning your sink. Not only are they toxic if ingested (do you really want remnants of chemicals where you cook your food?), but they can be very expensive. You can make homemade cleaners using common household items. It’s more environmentally friendly, and more cost-effective. Abrasive sponges should also be avoided because it can scratch the surface of your sink.
What You’ll Need:
Liquid Dishwashing Soap
Baking Soda
Distilled White Vinegar
Lemon Juice
Rags or soft sponges
Old toothbrush
1. Wet the entire surface of your sink. Sprinkle baking soda all over the sink and use the rag or sponge to rub in until it forms a paste. Baking soda makes a great sink cleaner because it's abrasive enough to scrub away light hard water deposits and stuck-on grease and food, but not so abrasive as to scratch fixtures like faucets. And because it's a food product, you don't have to worry about chemical residues coming in contact with your dishes or food.
2. Use the toothbrush to scoop up some of the baking soda paste and gently scrub the caulk rim around the top of your sink. Rinse, repeat, and wipe with a soft rag until the rag comes clean. For your garbage disposal, use this technique to clean the rubber flap, gently inverting it so you can also clean the underside. You'd be surprised about the amount of grime and bacteria hiding under there! Don’t forget to clean the sink strainers and any other sink pieces.
3. After you’ve finished scrubbing with the baking soda, spray the entire surface with the distilled white vinegar and let it sit for 10-15 minutes. Vinegar is a natural antibacterial agent, so it’s perfect for the kitchen. Plus, vinegar’s acidity is great for dissolving calcium deposits and water spots.
4. Rinse the entire sink with liquid dishwashing soap and water, making sure that you remove all baking soda residue from the surface. Then wipe the sink dry with a clean cloth.
5. To disinfect your garbage disposal, pour a half a cup of baking soda down the drain. Add one cup of a mixture of vinegar and lemon juice on top of the baking soda. Allow this mixture to sit for a few minutes. While you’re waiting, boil a kettle of water. Once it’s boiled, pour it down the drain to rinse away the mixture, leaving your drain bacteria free.

Do you have any tried-and-true cleaning tactics? Let us know on our Facebook page!